Last modified: Oct. 22, 2010
Contents
1 - Summary
2 - Zabbix Agent installation
3 - Service configuration
4 - Service check
1 - Summary
This guide will show how to install the Zabbix Agent in Windows. The Zabbix
Agent is the client software that installs on the servers and sends information
to the Zabbix server. Zabbix is an open source monitoring solution. This has
been tested in Windows 2000, XP, 2003 and 2008.
2 - Zabbix Agent installation
Download the zabbix agent Windows package at http://www.zabbix.com/. I create
a new directory named C:\Program Files\zabbix. Copy the three files for the
32-bit or 64-bit architecture to the new directory.
3 - Service configuration
Create a configuration file in the zabbix directory.
C:\Program Files\zabbix\zabbix_agentd.conf
Here is a simple example.
Hostname=server.test.com
ServerPort=10051
Server=zabbix.test.com
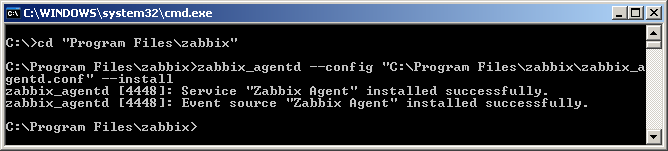
Install the service by opening a command prompt and navigating to the zabbix
directory and typing the following.
 Set it so that the zabbix agent service will start when the system starts up. Open
the services management console by typing the following at the Run button on
the Start Menu.
services.msc
Set the Zabbix Agent service to have it's startup type to be Automatic.
Set it so that the zabbix agent service will start when the system starts up. Open
the services management console by typing the following at the Run button on
the Start Menu.
services.msc
Set the Zabbix Agent service to have it's startup type to be Automatic.
 Before starting the service, make sure that tcp port 10050 is open in case you
are running firewall software.
Open a command prompt and start the zabbix agent service.
Before starting the service, make sure that tcp port 10050 is open in case you
are running firewall software.
Open a command prompt and start the zabbix agent service.
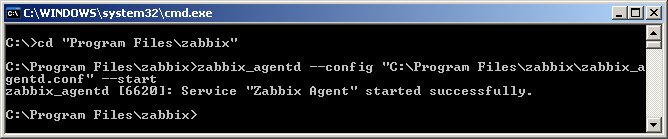 The service has successfully started.
4 - Service check
Reboot your computer. Log in like normal and check to see that the zabbix
agent service is running. Open a command prompt and check to make sure that
the zabbix agent service has started.
The service has successfully started.
4 - Service check
Reboot your computer. Log in like normal and check to see that the zabbix
agent service is running. Open a command prompt and check to make sure that
the zabbix agent service has started.
 That's it, now you have the zabbix agent running in Windows.
|
